Static DHCP Reservations for Unifi Devices
I switched my home network over to Unifi gear a few years back and have been thoroughly impressed. In my experience, it’s fast, reliable, and fairly inexpensive. However, some of the user interface can be a little less than intuitive. I hit the following friction point every time I add a new piece of Unifi gear to the network.
Creating DHCP Reservations for Unifi Gear
I like to keep my networking infrastructure in a loosely organized IP topology. Rather than hard-coding static addresses on the specific devices, I prefer to create DHCP reservations. You would think this would be easy, but for some unfathomable reason, the Unifi controller hides the ability to set DHCP-assigned IPs for Unifi specific gear. It’s important to note that these steps are not necessary for regular devices on your network, just for the infrastructure.
- Find your new device’s MAC
-
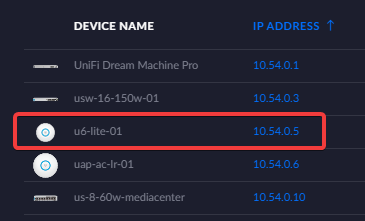
Find your new device on the Devices tab in your Controller. In this example, I’ll be giving a static IP to
u6-lite-01.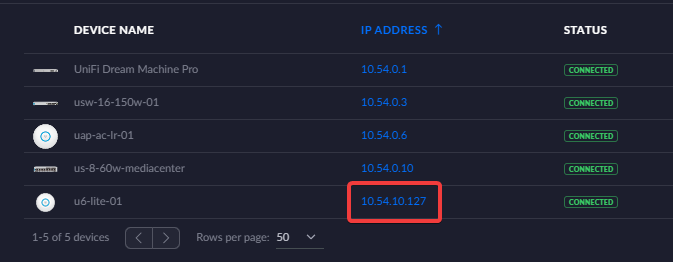
-
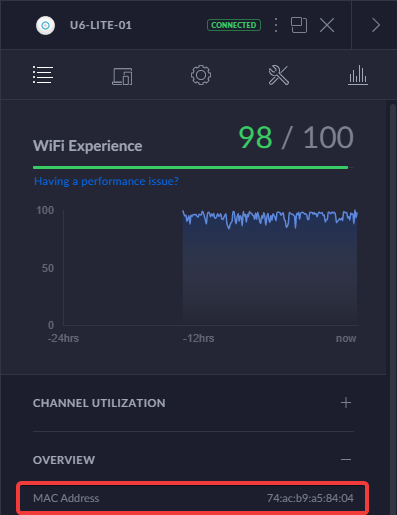
Select your new device and expand the Details tab to find your device’s MAC address. Write the MAC down somewhere.
-
- Create a new Unifi “client” to hold your reservation
- Navigate to the Clients screen in the controller and select
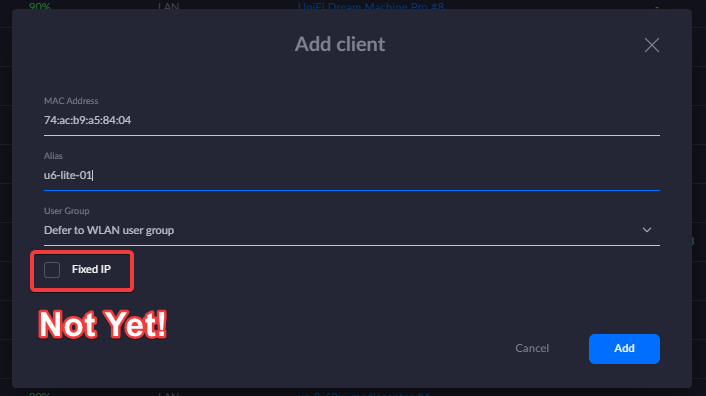
+ Add Clientat the top. -
Add a new client with MAC + alias, click Add (don’t set fixed IP yet!).
- Navigate to the Clients screen in the controller and select
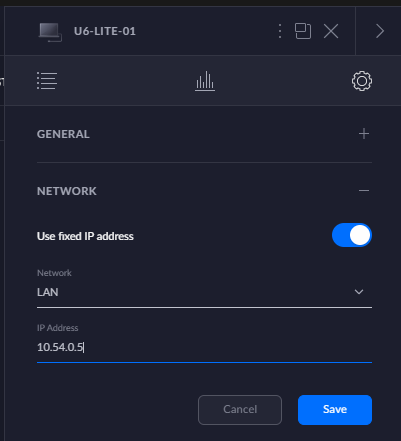
- Set your fixed IP
- Still on the Clients screen, select
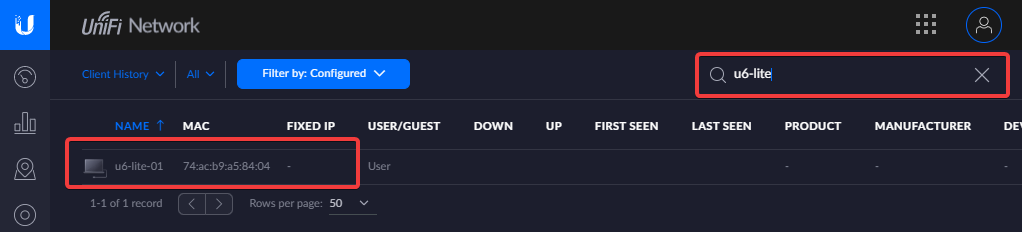
+ All Configured Clientson the top. -
Filter to your newly added alias.
- Select your new device.
-
Navigate to the Network tab and give it the fixed ip.
- Still on the Clients screen, select
- Restart your device so it grabs the new IP
- Find your device and restart it.
-
Enjoy your AP at its new IP!
comments powered by Disqus